Router transformation is an active and connected transformation in informatica Cloud services. It is similar to filter transformation except that multiple filter conditions can be defined in the router transformation.
Here in place of multiple filter conditions we can use router transformation.
Here we can create multiple groups with each having its own filter condition.
Procedure:-
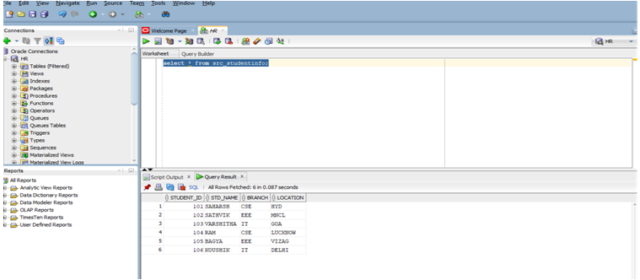
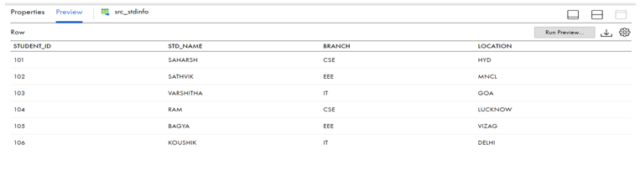
- Open SQL server and check the source table src_studentinfo by giving the select statement.
- Login to IICS and Click on new mapping.
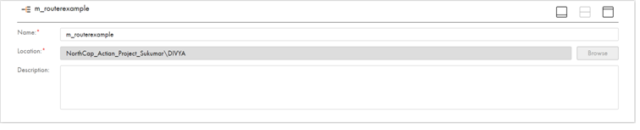
- Click on create to create new mapping and rename the mapping of your choice for example:m_routerexample.
- Click on the Source and rename the source name as required.

- In the properties go to Source and configure the connections by selecting the required connection name.
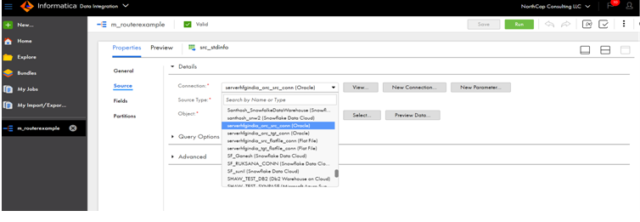
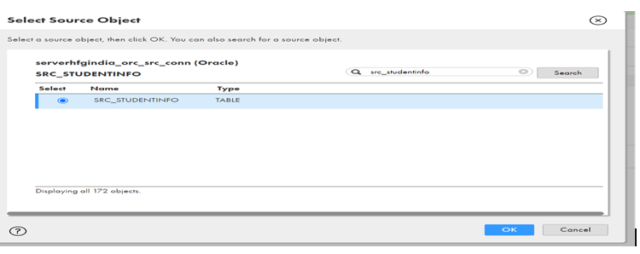
- In the Object select the source object and click on ok.
- In the source properties click on preview to preview the data.
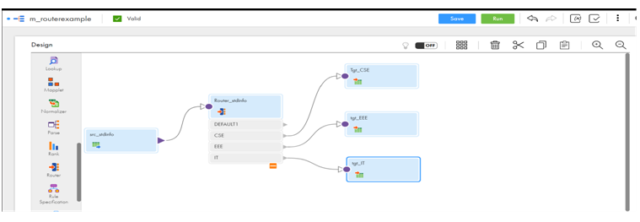
- Drag the Router transformation from the left side of design menu and select the transformation.
- Rename the Router transformation.
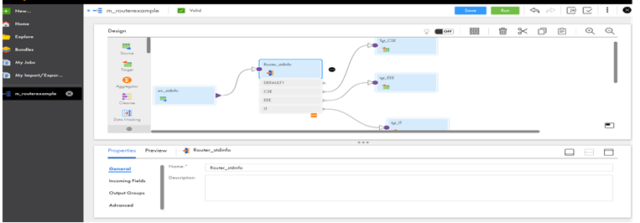
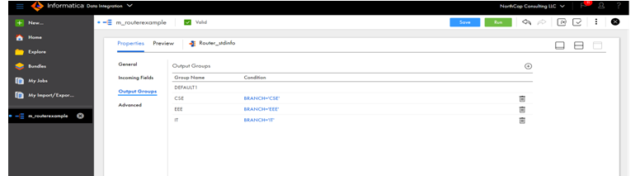
- Click on the output groups and mention the group name and give the required filter condition as it will filter based on the condition.
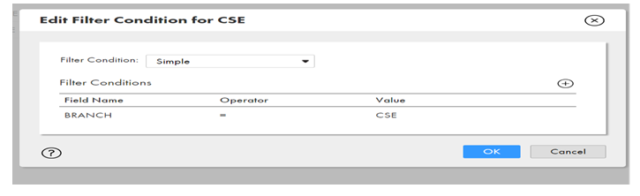
- We can specify multiple filter condition as shown below.
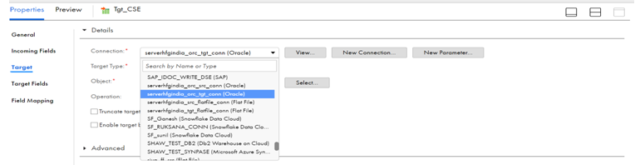
- Here we need to drag 3 targets as per the filter condition. Click on the Target and rename the target and in the properties click on the target and configure the target connections.
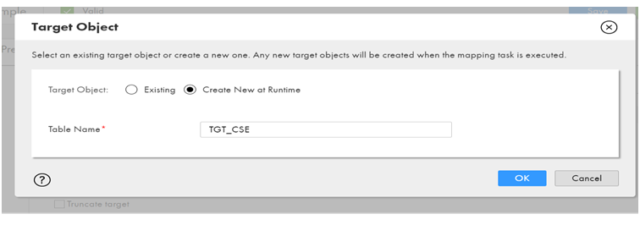
- To create the target at run time click on select and select the target object create new at run time and give the target table name and click on ok.
- Click on the 2nd Target and rename the target and in the properties click on the target and configure the target connections.

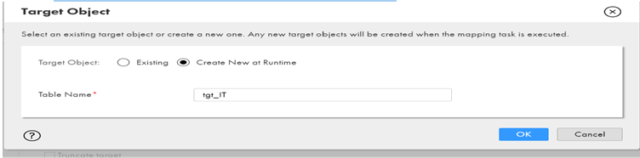
- Click on the 3rd Target and rename the target and in the properties click on the target and configure the target connections.
- Click on save to save the mapping
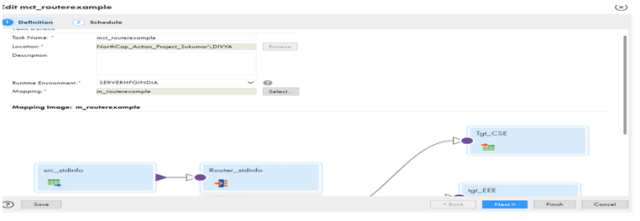
- Click on new to create the mapping task and give the proper task name and specify the Run time environment.

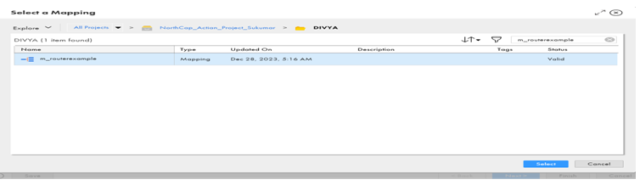
- Click on select and select the mapping from the mapping list as shown below.
- Click on next and click on Finish.
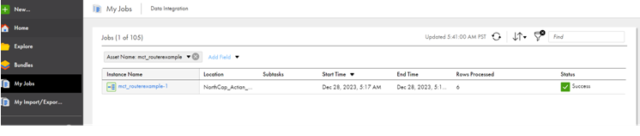
- Click on Run to run the mapping task.
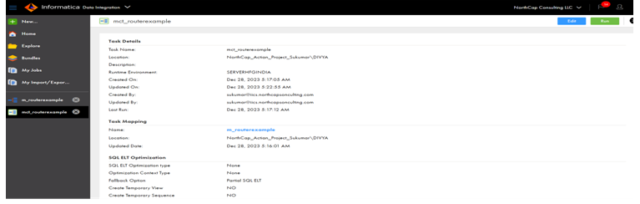
- Go to My jobs and check the status.
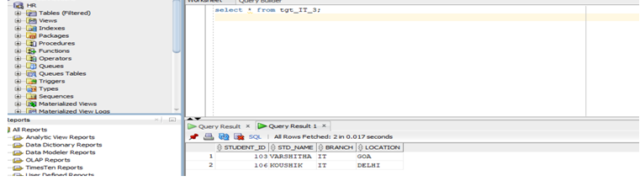
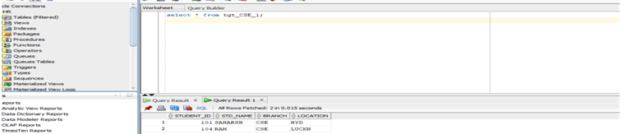
- Check the output in oracle SQL developer HR database. Here we can see all the records with branch CSE in 1 target table.
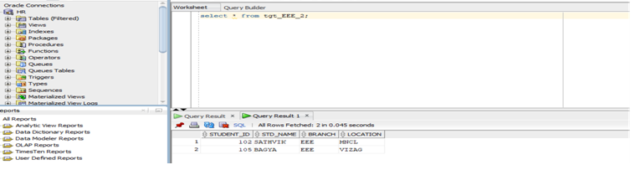
- Here we can see all the records of the students with branch EEE in 1 target table.
- Here we can see all the records of the students with the branch IT in 1 target table.